Monday, August 20, 2012

30 days of Ramadan Crafty challenge roundup (2012)

The 30 days of Ramadan Crafty Challenge started back in July 2011 to give my three daughters a fun creative outlet for making Islamic crafts.  I had hoped that these crafts would occupy their new days of fasting. 

As I wasn't able to find any Arabic, North African or Islamic craft books at our local library or online, we've just made up our own creations, using other holiday crafts as inspiration. 

It was our hope to inspire others to celebrate the month of Ramadan with their own children. 

We are looking forward to Ramadan 2013 to create more crafts!

Here are the 2012 crafts in alphabetical order:

1.    A Nesting Islamic 8 Point Star Mobile
2.    Arabic Newspaper Gift Bag
3.    Arabic Newspaper Hairclip
4.    Arabic Newspaper Star
5.    Eid Blue and Yellow Paper Garland
6.    Eid Candles
7.    Eid Countdown Chain
8.    Eid Goodie Gift Basket
9.    Eid Lambs
10.  Eid Metallic Star Tutorial
11.  Eid Mubarak 2012 puzzle
12.  Eid Saeed Table Runner
13.  Eid Spraypainted Lanterns
14.  Egyptian Fez Party Hat
15.  Glittered Glue Garland
15b. Glittered Glue Garland - part two
16.  Hanging Vellum Ramadan Lantern
17.  I Love Allah This Much Card
18.  Kaab'a Paper Clip Bookmark
19.  Lebanese Cedar Bead Tree
20.  Mosque Banner
21.  Mosque Night Light
22.  Our Islamic World Word Search - free download
23.  Palestinian Heartbreak T-shirt
24.  Peace Cork Coaster
25.  Ramadan Moon & Star
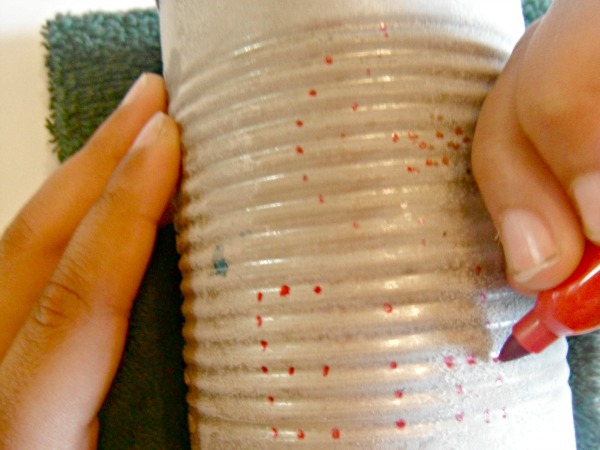
26.  Recycle Can Eid Lamp
27.  Recycled Zakāt box
28.  Quilled Eid Mubarak Card
29.  Ramadan Good Deeds Sticker Book
30.  Syria is in My Heart Necklace

Sunday, August 19, 2012

Eid Mubarak 2012 puzzle

Eid Mubarak!!!!!!!!!!!!!
Wow, what an amazing month this has been.  Full of crafts, fun, and family!

Click here to read about our 30 days of Ramadan Crafty challenge or click on the tags on the right with the words Ramadan or craft tutorial  and they should get you to the 30 crafts we made over the past month.

To finish off our Eid tutorial crafts, I've created a fun Eid Mubarak puzzle for you to create.  May peace enter every house, joy blossom in every heart and Allah bless every soul in search of freedom!!

Saturday, August 18, 2012

Eid Spraypainted Lanterns

I had to go into Seattle today for a hair cut to get ready for Eid tomorrow.  While there, I stopped at my favorite store at Westlake Center, Daiso!  For those that have never been in a Daiso, it's basically like dollar store, but everything is from Japan.

I was walking around, finding all kinds of goodies for the girls' Eid baskets for tomorrow and came across these standing lanters.  Of course I had to buy them.  How could I not for only $1.50 each!  After I came home from my hair cut, the girls and I got to work getting them ready for the Eid party tomorrow!

Supplies
Paper lanterns
Spray paint
Xacto
Cutting mat
Print out of EID letters
Painter's blue tape

 
I printed out the letters EID in a Word document.  I wanted the letters to be big, since my lanterns are 10 inches high.  I changed the font size to 600.  Then use the Xacto to cut out the letters.  Be sure to save the middle of the D!

Tape the letters onto the lantens.  We also used a little bit of blue tape, folded over, inside the letter's edges so there wasn't any bleeding.  We thought it was a good idea to tape the three lanterns to each other so that they won't move around from the spray.  My daughter found some rocks to put inside the lanterns to help hold them in place.

Put down some cardboard or newspapers to save your driveway from turning yellow.  Spray your lanterns and make sure you don't over paint them.  You don't want the paint to run.

Let your lanterns sit outside until the paint is dry.  Hang your lanterns from a string, or just put them on your Eid table top for decorations.  Hope everyone has a Eid Mubarak tomorrow!!!

Friday, August 17, 2012

Kaab'a Paper Clip Bookmark Tutorial

Today's craft was a felt Kaab'a paper clip bookmark.  It does require a little bit of sewing, but still a very easy craft to make.

Kaab'a Paper Clip Bookmark Tutorial


Supplies
Scissors
Paper clip
Embroidery thread
Needle
Gold ribbon
Black felt
Yellow felt

Cut the yellow felt into a strip that is about half an inch wide and about three inches long.

Fold the yellow felt over the end of the paper clip and sew the two ends together.

Cut a piece of black felt into a four inch square.

Cut the ribbon to fit across the top of the square and sew it down with the embroidery thread.

Sew the black square to your yellow strip of felt.

That's it!  Your Kaab'a bookmark is ready to use.

I wanted to take a moment to thank everyone that has been following my blog.  This is my 200th post!  I won't be doing this still if it wasn't for your support.  The biggest compliment you can give me is to share this blog with your friends and encourge them to follow it too.  Jazakallah Khair!!!

Thursday, August 16, 2012

Palestine In My Heart T-shirt Tutorial

I've wanted to make this Palestinian t-shirt for awhile now.  While at the store yesterday picking up some Cling Wrap, I saw the Freezer paper and knew that it was time.  So I got the paper and today we got down to business to make this Palestine In My Heart* t-shirt.

Palestine In My Heart T-shirt Tutorial


*Update: This tutorial had previously been called Palestinian Heartbreak T-shirt.  However, I feel that the new name fits it better.  Sorry for any confusion.

Supplies
Blank t-shirt
Xacto
Cutting mat
Fabric paint
Flat edge paintbrush
Freezer paper
Pencil
Carbon paper
Large sheet of foam

Create an image on your computer and print it out. Cut off a piece of freezer paper to fit the size of your image. Put the shiny side down, with a piece of carbon paper on top and then your image on top of that. Draw out your image with a pencil.

Place your freezer paper on the cutting board and with the Xacto, cut out your design.  If your design is simple, you can use scissors, but since our map of Palestine had so many jagged edges on either side, we wanted to make sure we got of them.

Place your piece of foam inside your tshirt.  If you don't have a large piece of foam, you can also use cardboard, or another piece of freezer paper.  You just want to put something inside the t-shirt so that the paint doesn't go through to the back.  Place your freezer paper, shiny side down, on your t-shirt and iron it flat.  The shiny side of the freezer paper will adhere to the t-shirt.

When you start painting your fabric paint on the t-shirt, you want to make sure you paint from the outside of the paper inwards.  This will give you crisp edges and the paint will not bleed under the freezer paper.  We ended up putting two coats of paint on our t-shirt to really get the paint into the little crevices.

Let your paint dry and take off the freezer paper.  It should just rip right off your t-shirt.  Take an old towel or t-shirt, place it over your image and go over it with the iron.  This will help set the paint.  Your t-shirt is done so wear it with pride!  When someone asks you what it means, start a conversation with them about the apartheid that is happening in Palestine.

Wednesday, August 15, 2012

Eid blue and yellow paper garland

Today is another super easy craft with only a few materials.  You can use as much paper as you want to make the paper garlnad long, but for this blog, we just made a short one to show you how super easy it is to make.  The whole craft from start to finish took less then half an hour.

Supplies
Blue cardstock
Yellow cardstock
Ruler
Pencil
Paper slicer
Sewing machine

Cut your 8 1/2 x 11 carstock in half lengthwise with the paper slicer. 

Mark the half way point on the short end of the 4 1/4 x 11 paper with a pencil all the way down.

Using the paper slicer again, cut your paper in 1 inch strips.

Run the paper through your sewing machine on the pencil marks.  Alternate colors and leave a 1/4 inch gap between the paper.  I couldn't take a photo of me sewing this part as it's hard to run the sewing machine and take a photo at the same time, so this is what it looks like when you are all finished.

Hang your paper garland outide to welcome your guests to your Eid party.

 Or you can lay your garland on the table for a fun table runner!
I think the next time we might add stickers or use our moon and star punch out or cut out the stipes with decorative scissors to add a little something special to our garland.  The sky is the limit since it's paper.  Have fun with your own creation!

Tuesday, August 14, 2012

Eid goodie gift basket

Every year we go to an Eid party and celebrate with our lovely friends.  This year we'll be at a park and we thought it might be fun to make these picnic basket goodie bags for the kids.  They are so inexpensive to make and only require paper and two tools!

Supplies
12 x 12 double sided scrapbook paper
Popsicle stick
Stapler

Cut the 12 x 12 paper to 8 1/2 x 11.  Be sure to keep the pieces as you'll need the leftover long piece for the handle.  Fold the paper in half  and then each of the halves you've fold again in half.

Turn your paper in the other direction and do the same thing.  You'll end up with 16 squares on your paper.

With the short end towards you, bring the top and bottom flaps into the center.  Then you'll want to fold each end down to form triangles on the four corners.

Fold over the two center flaps toward the top and bottom.

Grab the pieces that you just folded and pull your basket open.

Take the long piece and fold it in half the long way.

This piece will be your handle, so you'll need to staple it down to the sides of the box.

Your Eid basket is done and ready to use.  Just fill with goodies and give it out to the kids!

Monday, August 13, 2012

Recycle Can Eid Lamp


Today is my birthday. I'm not going to tell you my age, as that is not important, but let's just say that my 5 year old thinks I'm 12. My 10 year old, however has her doubts. Today I spent some time with her to convince her that I'm still young at heart!  We made this recycle tin can lamp together.  She really got into the pounding of the nail and asked if we can make more of these on Halloween to put on our driveway. But of course they will have moons and stars! :)


Supplies
Tin can
Hand towel
Hammer
Nail
Sharpie


Open one end of the can of food and fill it with water.  Place in your freezer overnight so that your can is full of ice.  This makes it easier for the nail.

Place your tin on the hand towel so that it doesn't roll away and draw out your design with the sharpie.  We did the word 'Eid' and put a moon and star over it.

Place the nail on the dots you've drawn out and punch a hole with the hammer.  Your hole doesn't really have to be very big or deep.

Place your can upside down in the sink until the ice melts and your water runs out.  Or you can place your can outside like we did.  Since it was so hot out, it only took a few minutes for the ice to slide out!

Place a tea light candle at the bottom of your tin.

My daughter put a star design on the back of the candle and this what it looks like when it's all light up.

I have to say that I loved this craft for how easy it was to make.  I'm going to start saving those tin cans from our food.  These would make a great addition to camping too!

Sunday, August 12, 2012

Recycled Zakāt Box Tutorial

Last year we made a Zakāt box out of a blank wood box. 

This year we decided to go green and make a recycle box out of materials we already had: we used a Ben & Jerry's Ice Cream Pint carton to come up with this box.
Recycled Zakāt Box Tutorial


Supplies
Ice cream pint carton
Scissors
Pencil
12x12 scrapbook paper - 2 sheets
Glue
Rub-on letters
Xacto
Cutting mat

Use the carton to make your template.  Lay it down on the back of the scrapbook paper and mark with the pencil as you roll out the carton.  Cut out the arc on the paper.

Start gluing the paper to the ice cream pint carton.

Our second 12x12 scrapbook paper had strips on it, so we used those as a guide to cut out our decorative strips.

Glue the strips to the outside of the carton on top of the other paper.  Trim off the bottom.

We also cut out an extra strip and glued it to the outside of the lip to cover up the black that is on the carton.

I didn't trust my 5 year old with the Xacto, so I did this next step for her.  On the inside of the top of the carton, draw out a rectangle big enough for a folded bill.  Use the Xacto to cut out that shape.

We used the lid as a template and cut out a circle out of the scrapbook paper and then cut out a rectangle in that too.  We wrote out the word Zakat with our rub-on letters and used the tool that came with our letters to rub the letters on the lid cover.

We actually didn't end up using glue on our lid since the paper fit very nicely in the inside of the lip.  But you might want to glue down your paper if you are using a different carton.

Your Zakāt box is ready to use!


Related Posts Plugin for WordPress, Blogger...